Requesting a Partnership
Partnerships allow users from different companies to communicate, share information and documentation necessary to conduct business. To request a partnership with company, click the “+ Add Workflow” button to start the process.
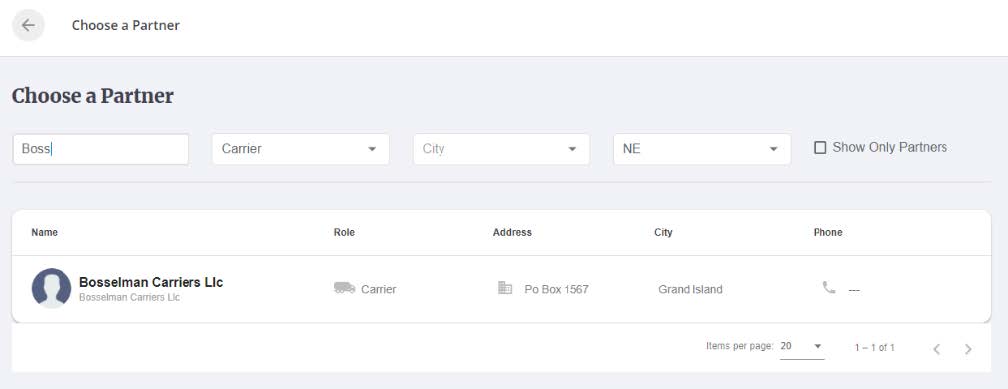
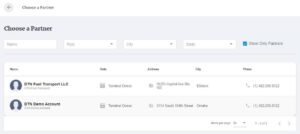
• The first step in creating a partnership is to choose a partner.
o When looking for a new partner, uncheck the Show Only Partners check box. This will expand list beyond the current partners and allow you to search the entire catalog of available partners in the system.
• The filters can be used to narrow the selection until the desired company is found.
• Click the company record to continue.
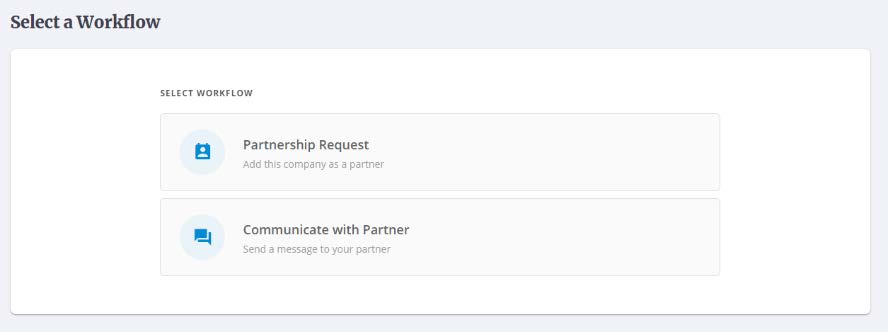
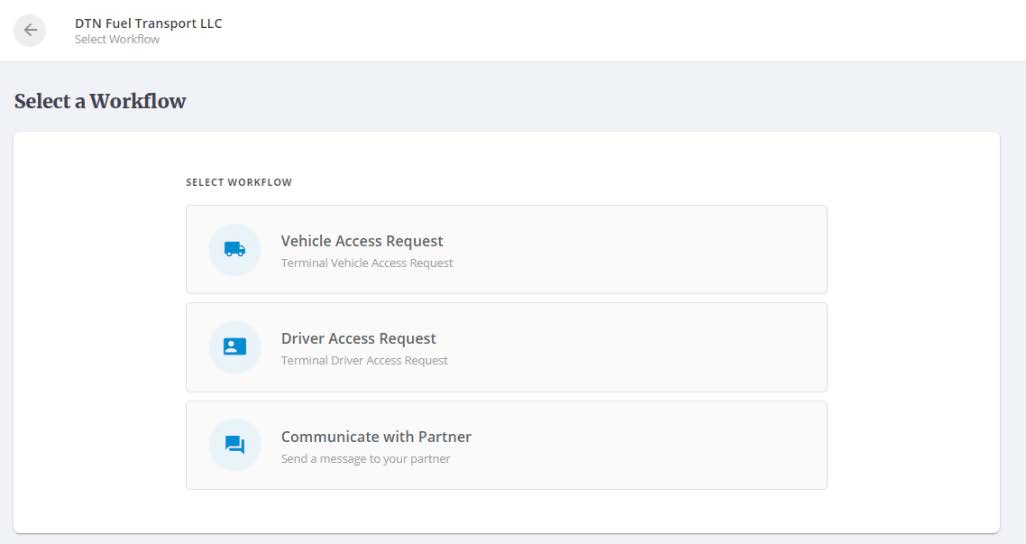
• Select the “Partnership Request” workflow to begin working with the selected company.
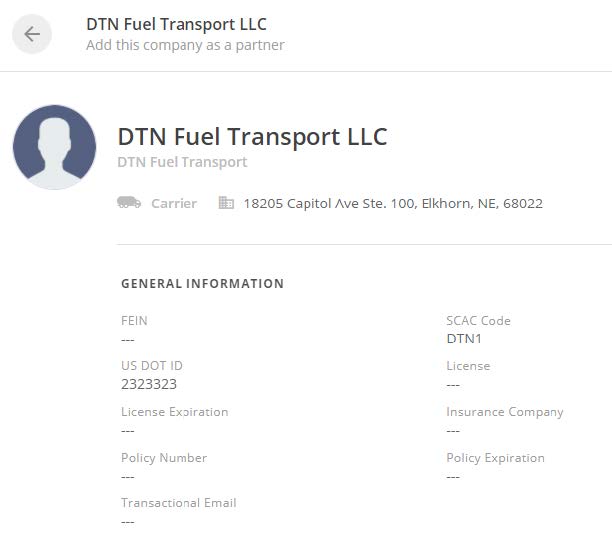
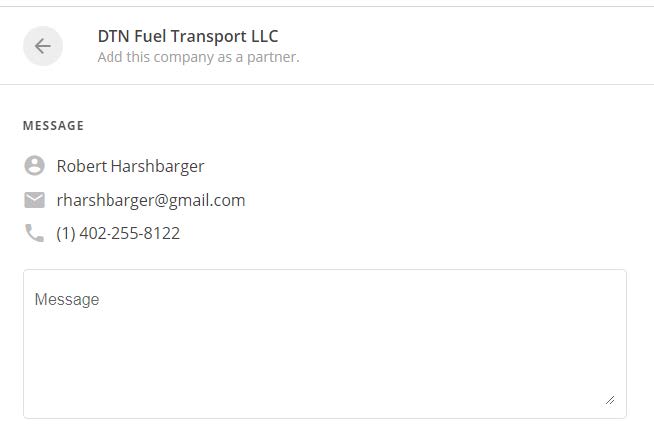
The user will be presented with a page containing details about the selected company. Review the information to ensure the correct company was selected.
If the company is already active within the system, the primary contact information is displayed. Providing a quick message and clicking the “Submit Request” button will send the request to the partner company for approval. Request from partners already in the system will appear on the companies work screen.
There is an option to sponsor the partner. If option is selected, an email with instructions on how to the access the system will be sent. (Note: There may be additional cost for sponsoring partners. Please contact your DTN sales representative for more information).
Accepting a Partnership
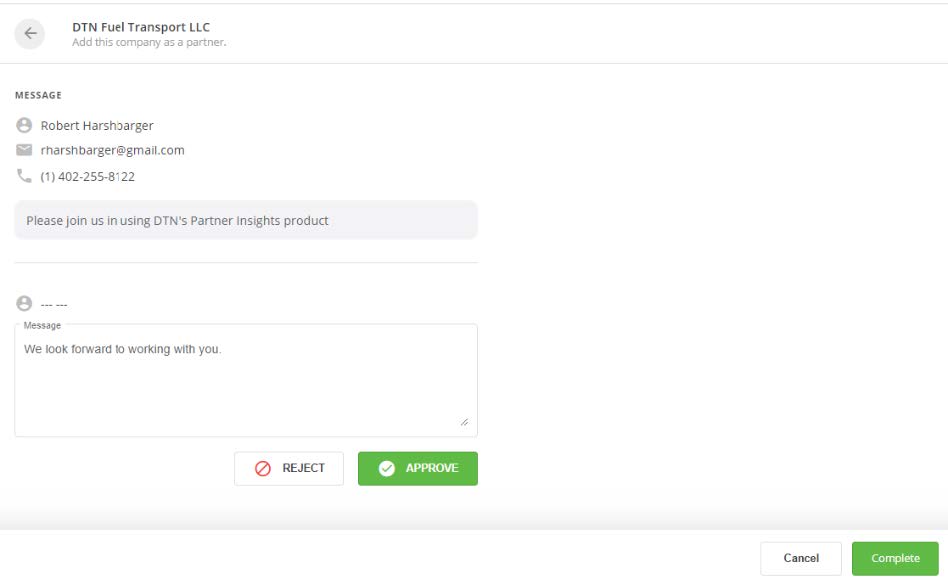
Upon logging into the system, the company will see a new request in workflow queue.

In just a couple of clicks, the request can be either rejected or approved. The response will appear in the requestor’s workflow queue.
If approved, as partners, the companies can begin sharing documents, along with data records that can be integrated directly into a TAS, ERP or other system.
Requesting Terminal Access
To request terminal access for a driver or vehicle, click the “+ Add Workflow button on the main Work page. Locate the terminal operator in the “Choose a Partner” list.
Once the partner is selected, the simple selection will guide the user to the next step. To request driver access at a terminal, select Driver access request.
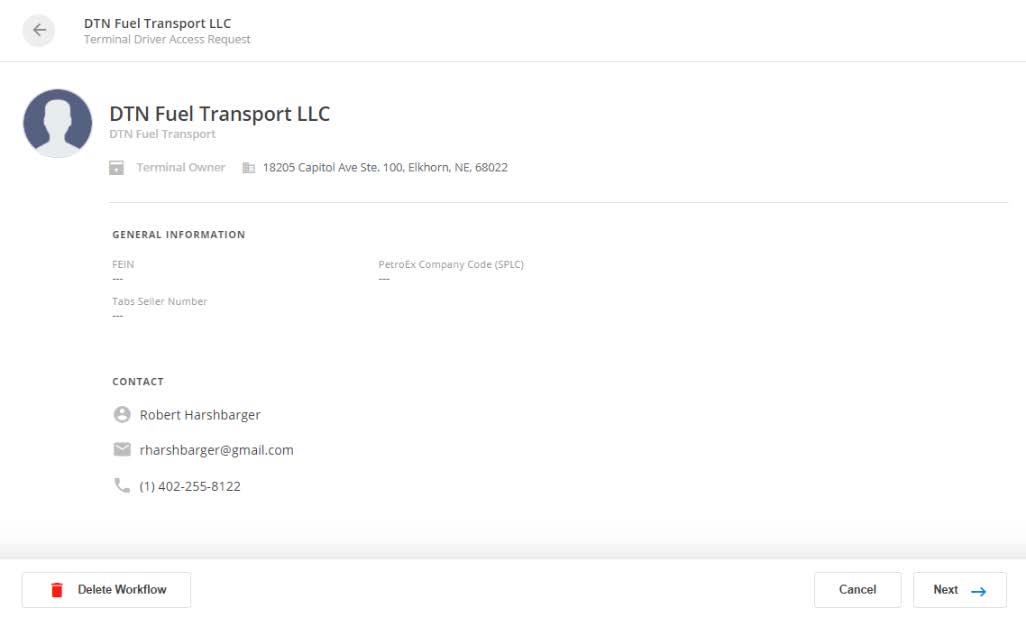
The next page will present the user with the general business information and contact information of the partner selected for validation.
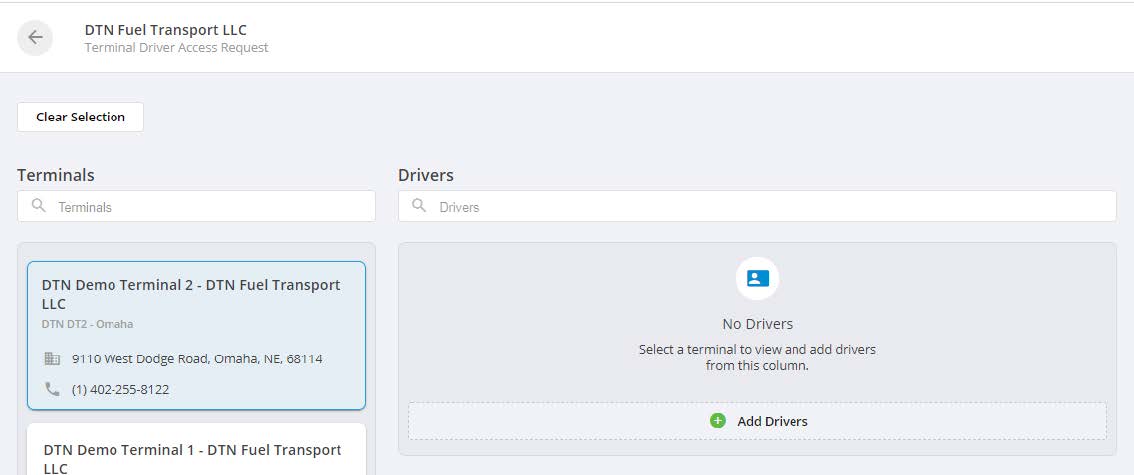
Clicking “Next” will take the user to the main page. At this point, simply select the desired terminals and click “Add Drivers”. The terminal filter allows the user to type the name of the terminal to narrow the list.
Add one or more driver by using the checkbox next the driver’s name. Filters on the page allow you to narrow the list by driver name or state. Once the drivers are selected, click continue.
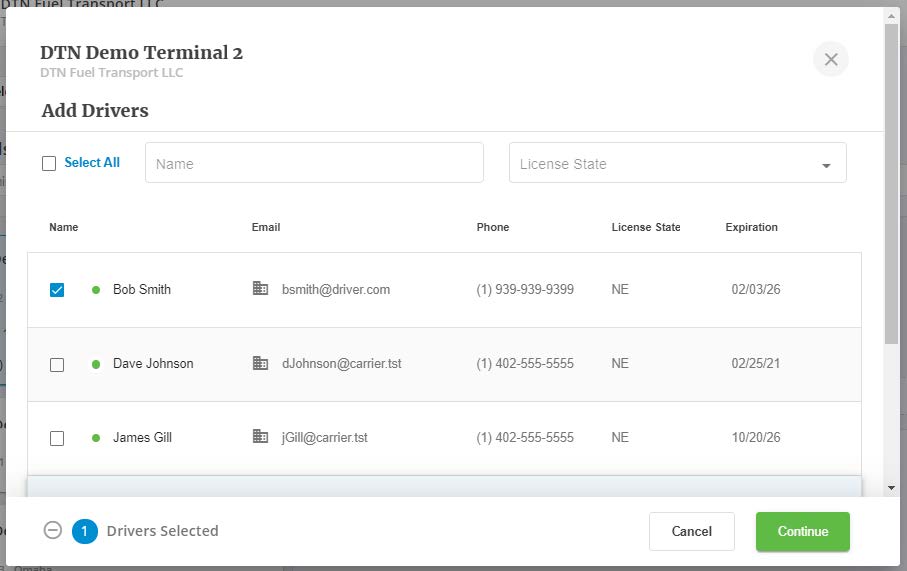
Clicking continue will add the drivers to the selected terminals.
If a driver is added to a terminal that is missing one or more of the certifications required by the terminal operator, the user will be notified with a warning.
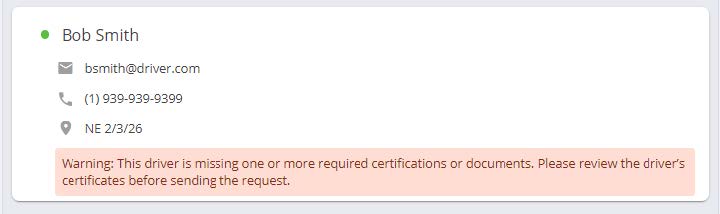
This gives the user the chance to ensure all the required documentation has been completed prior to sending the request to the terminal operator.
Once submitted, the work item on the main page will be updated with a “Pending” status and a new work item will be added to the terminal operator’s page.
![]()
Once the request has been processed by the terminal operator, the work item status will change to either “Approved”, “Partially Approved” or “Rejected”.
![]()
If rejected or partially approved, the user can click the work item and see the reason for the rejection left by the terminal operator. Additional information can be added to the driver record and the driver can be re-submitted.
If approved, any data updates or additional documentation added to the driver records is shared with the terminal operator.
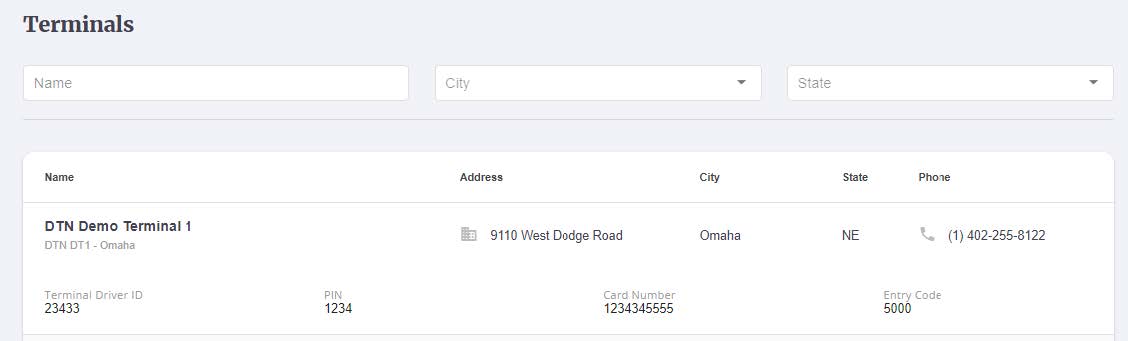
Looking at the driver record, carriers can see which terminals have granted access to the driver along with the terminal assigned information like driver id, PIN number, card number or entry code.